Text Properties
Text properties can be changed for most text objects. To set properties for most text objects, open the Font section in the Property Manager to set the text or label properties.
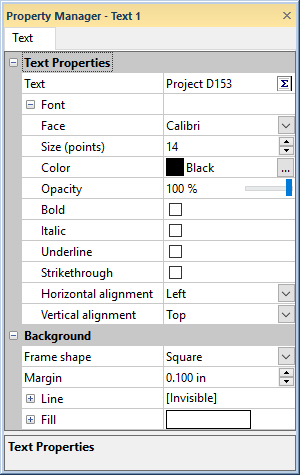
The text properties appear in the Property Manager
in a Text Properties section or Font section.
Text
Quickly set the text by typing directly in the Text
field. Math text instructions
can be used in the title Text
field. Click  in the Text
field to add complex formatting or text in the Text
Editor dialog.
in the Text
field to add complex formatting or text in the Text
Editor dialog.
Math text instructions are used to apply unique formatting to characters or words in the text and to create multi-line text. When a change is made to the entire Text string in the Text Editor, the following Font properties are updated. Conversely, changing any of the Font properties affects the entire Text string. However, math text instructions take precedence over Font properties. When a change is made to a subset of the text, the Text Editor adds the appropriate math text instructions to the Text field.
Face
The Face is the font that is used for the text. To change the Face, click on the current font name. Select the desired font name from the list. Click the arrow button or select a font and use the ARROW keys on the keyboard to scroll through the Face list. The selected font is displayed in the Text Editor. The font files that are installed on your computer are displayed in the Font list. Grapher supports true type fonts.
Size (Points)
Set the text size in the Size (points) field, between zero and 720 can be specified.
Color
Change the Color of the text by clicking on the
color box. Select a new color by clicking on a color in the color palette.
Create new colors by clicking the  button to the right of the color name.
Opacity
The Opacity controls the transparency of the text. Select a value between 0% (zero opacity, full transparency) to 100% (full opacity, zero transparency).
Style
In most instances, there are check boxes for the style options. Check the box next to Bold, Italic, Underline, and Strikethrough to apply one or more of these styles to the text or label. Note that some typefaces, such as Symbol, do not support bold or italicized text.
- Bold will increase the thickness of the text (i.e. example).
- Italic will create oblique text (i.e. example).
- Underline will add a horizontal line under the text (i.e. example).
- Strikethrough will add a horizontal line through the center of the text (i.e. example).
Alignment
The Alignment controls the location of the text relative to the reference point. A reference point is the point clicked in the plot window when the cross-hair cursor is placing the text on the screen. The text box is horizontally and vertically aligned relative to the reference point. The default position is that the reference point is at the upper left corner of the bounding box (left, top).
- Left horizontally aligns the text box so that the reference point is to the left of the text box.
- Center horizontally centers the text box on the reference point.
- Right horizontally aligns the text box so that the reference point is to the right of the text box.
- Top vertically aligns the text box so that the reference point is above the text box.
- Baseline vertically aligns the text box so that the reference point is located at the base of the text. The baseline is the imaginary line along which characters are positioned as they are drawn. Descenders on characters, e.g., "tails" in the letters p and q, are drawn below the baseline.
- Bottom vertically aligns the text box so that the reference point is below the text box.
- Center vertically centers the text box on the reference point.
Text Box Properties
The text object includes background and margin settings in the Text properties.
Frame
The Frame shape property changes the background shape of the text box from square corners to rounded corners. Select a Square or Rounded frame shape.
Margin
The Margin property sets the
padding between the text and the text box frame. Values range between
0 and 1 inches (0 and 2.54 cm) for the Margin.
To enter a Margin, highlight
the existing value and type a new value or press the ![]() to increase or decrease the value. Press ENTER on the keyboard to make
the change.
to increase or decrease the value. Press ENTER on the keyboard to make
the change.
Background Line and Fill
Set the background line properties in the Line section. Set the background fill properties in the Fill section.
Default Settings
You can set default text properties with the File | Options command. In the Options dialog, scroll down to the Defaults section and click on the word Font to access these defaults. Changes made in the Options dialog affect all subsequent documents.
ANSI Translated Using
ANSI encoding contains characters within the first 256 characters of a font. These are normally in English. Select the code page from the list that will read the data correctly. The selected code page is the default language to use with Unicode text. This text option is only available in the Options dialog Defaults page.
Font Properties Dialog
When changing some options, a Text Properties dialog is displayed. The options are the same as described above in the Property Manager. In addition, the Text Properties dialog has a Sample section where the font can be previewed.
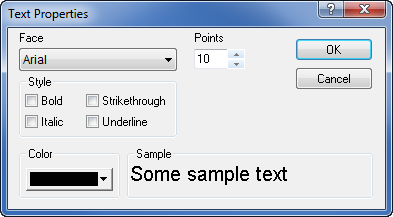
Set the text properties in the Text Properties dialog.